|
|
|
|
|
|
Too Much Bling Bling!
A tongue-in-cheek look at technology fashions
author: Martin "mpot" Pot
date: 16 February 2005
Introduction
These days, it seems to be becoming fashionable to see how many bright and/or flashing lights a modder can cram into a PC case.
Disturbingly, this trend seems to be spreading to consumer items too.
This article has a brief look at some consumer items I've purchased recently which have succumbed to this trend.
Personal Tastes
I personally prefer function to form, and have stayed away from PC case windows, neons, cold cathodes, etc, preferring to stick with a plain-looking beige computer case.
To me, the main function of a computer case is to hold all the components together, and to keep young fingers, rodents, etc out of the spinning bits.
Adding a window and lights isn't going to help it perform this function any better (in fact, windows and lights will just serve to invite young fingers to touch...).
(This also applies to my taste in car modifications, rather than ricing up a car with a spoiler, 18" alloys and a big chrome exhaust tip, I prefer to spend some money on suspension or intake modifications.)
Note that I'm not trying to knock the modding community. I have a lot of respect for some of the PC case creations that I've seen over the last few years.
However, simply cutting in a window and adding a neon or five and some LED chasers is not my idea of a well-modded case.
Video Card
A number of months ago, I bought a new video card for my desktop PC. I purposely stayed away from video cards with big flashy heat sinks and coloured lights, and bought what looked to be a fairly plain and functional ATI Radeon 9600 XT.
After installing it, the first thing that I noticed when I powered my PC on was the flashing coloured LEDs from the fan on the GPU.
The fan has a number of coloured LEDs in it, with the colours repeatedly cycling.
After having a closer look at the card, I decided it wasn't worth trying to swap the fan for a non-LED fan. My PC case doesn't have any windows, and normally resides underneath my desk, so I don't notice the coloured LEDs when the case is closed.
Power LED on LCD Monitor
A couple of months ago I bought a 17" LCD monitor (PolyView V17E). However, when I first powered it on, the thing that struck me was just how bright the blue power LED was!
This power LED is just next to the power switch, immediately below the screen itself. The LED was bright enough to be very distracting, to the extent where it was just too bright to be able to look at the bottom part of the monitor without needing sunglasses.
Luckily, the LED was shining through a small plastic diffuser, mounted in the case, which had a flat surface on it. A couple of coats with a permanent marker dulled the brightness sufficiently to allow me to use the monitor without being blinded.
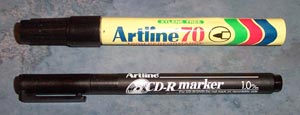
some permanent markers
the "modded" LED with several layers of ink
Interestingly enough, the manual that came with the monitor made reference to a green power LED, so it looks like the super-bright blue LED was a recent change made to the monitor after the manuals were printed.
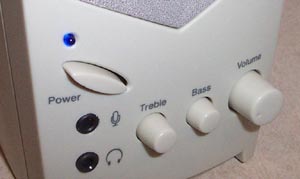
Power LED on Computer Speakers
Several weeks ago, I bought some powered computer speakers for my wife's computer.
When the speakers were first powered on, I was immediately struck by the brightness of
the power LED.
However, this LED protruded directly through the front of the case, without any diffuser. As a result, it was much more difficult to apply a layer of ink over the LED, as only the tip of the LED was exposed.
This called for some more serious action, so with the aid of a screwdriver, the speaker was quickly disassembled, exposing the entire LED.
After a number of coats of ink, the speaker was reassembled, with the LED now at a much more pleasing level of brightness.
the "modded" LED with several layers of ink
As with the LCD monitor, the manual for the speakers made reference to a green power LED, so again the super-bright blue LED appears to be a late addition.
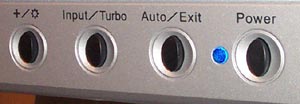
Power LED on Volume Control
More recently, I bought some Logitech Z3e speakers. These speakers have a wired remote control, which has a volume control, headphones socket, power switch, and LED to indicate the power status.
As seems to be fashionable, it was a super-bright blue LED.
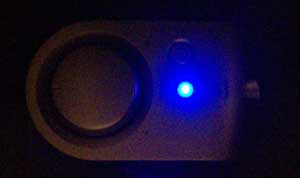
before modding: very bright LED
The brightness of the LED caused my camera to under-expose the photo shown above.
As the LED was recessed into the top of the case, it had to be disassembled to provide access to the LED for modification.
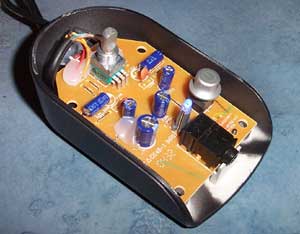
cover removed, unmodified LED
| |
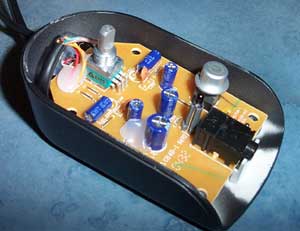
the LED now has a coat of ink
|
A permanent marker was used to coat the entire LED with ink, to darken it.
Once the ink was dry, the case was reassembled.
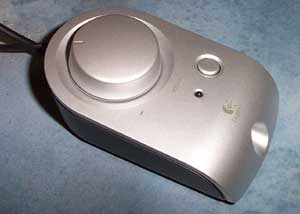
the finished product
The end result is a much more pleasing level of brightness for the power lED on the remote. The LED is still bright enough to indicate if the power is on or off, but no longer has that blinding brightness anymore.
Reducing LED Brightness
As described above, a permanent marker is the easiest way to reduce the brightness of a LED.
It is also the least intrusive method, and shouldn't affect the warrenty on your item.
Note that in some instances, you'll need to open the case of the item in order to access the LED. Just opening the case can void the warrenty of some items, so be sure to read the fine-print first.
Some other methods for reducing the brightness of these LEDs include:
- disconnect the LED
If you decide you can do without the LED, disassemble the item until you can access the leads to the LED, and cut one of these leads. This will stop the LED from lighting up at all, and shouldn't affect the operation of the item in any way.
- replace the LED with a lower-brightness LED
This option is not for the faint-hearted, and requires the item to be disassembled, with a soldering iron required to remove and replace the LED. You also need to ensure the replacement LED is appropriately sized and shaped to allow it to fit into the hole vacated by the original LED.
- install a resistor in series with the LED
A resistor will reduce the voltage across the LED, thus reducing the brightness. The resistor needs to be installed in series with one of the leads of the LED.
Some experimentation may be required to identify the appropriate resistor value, and as per the previous option, the item needs to be disassembled to allow sufficient access to the internal connections to the LED to allow the resistor to be installed. All connections should be soldered, and be sure to insulate the soldered joints, to ensure they won't short out against any other exposed contacts inside the item.
- put a layer of masking or packing tape over the LED
This method is probably one of the least "L33T" for reducing the brightness, and is more of a hack than a mod. However, it's probably the quickest and easiest way to reduce the brightness.
- cover the LED with some other translucent material
Alternatively, you could remove the LED, cover it with some thin translucent plastic, and then replace it, either using the mounting of the LED in the front cover to hold the plastic in place, or use some glue.
A Call To Manufacturers
Manufacturers of electrical items need to realise that not all consumers want super-bright LEDs to dazzle the users.
Maybe they should sell items with "standard" LEDs, as well as a variation specifically targeted at the "L33T" users, who want the mind-numbingly-bright LEDs.
At the very least, they should include a warning on the packaging:
This item uses super-bright LEDs for extra bling bling.
Do not look directly at the LEDs.
Protective eye wear required when using this item.
|
|
|
|
|
|
|
|
|

