|
Whiteline rear sway bar installation on TJ Magna wagon
This page describes my experiences with the installation of a Whiteline BMR67 rear sway bar
on my Mitsubishi TJ Magna wagon.
Background
After having driven a modified Datsun 1200 with very tight suspension,
followed by a U12 Pintara, I found the handling of
the TJ Magna wagon somewhat lacklustre, despite the low King springs that
I installed within weeks of buying the Magna.
In an effort to reduce body roll and improve handling, I decided to fit an aftermarket rear
sway bar, with
Whiteline Automotive being my supplier of choice when
it comes to aftermarket sway bars.
The factory rear sway bar on the TJ Magna wagon has a diameter of 18mm
and the Whiteline BMR67 sway bar has a diameter of 22mm.
According to Whiteline, this will result in an increase in torsional stiffness of approx 120%
(assuming similar shape, design and material specifications).
The BMR67 sway bar was ordered via Whiteline's website, and was delivered approximately one week later.
The cost of the sway bar was $235, with an additional $31.90 in courier costs, totalling $266.90.
The kit comes with all brackets, nuts, bolts and instructions required for installation.
Note that some of the sway bars sold by Whiteline are listed as replacement bars, while the
BMR67 is listed as kit. The kit sway bars are typically designed for cars that do not have
a factory sway bar installed.
However, with the Magna wagon, although it has a factory-fitted rear sway bar, none of the mounting
points are re-used by the Whiteline rear sway bar, and hence the BMR67 is only sold as a kit.
The BMR67 kit includes the following components:
- sway bar
- 2 x u-bolts and brackets for attaching sway bar to axle
- 2 x sway bar bushes for attaching sway bar to u-bolts
- 2 x brackets for mounting the pin links
- 2 x pin links and bolts
- 8 x bushes for attaching sway bar to pin links
- instruction sheets
Some polyurethane grease for the sway bar bushes should also be included in the kit, but for some
reason, my kit was missing the grease.
However, I had plenty of polyurethane grease left over from suspension upgrades on previous cars,
and Whiteline later sent me a small bag of grease.
Caution
Never work underneath a car that is only supported by a jack.
Always securely support the car using car ramps and/or axle stands.
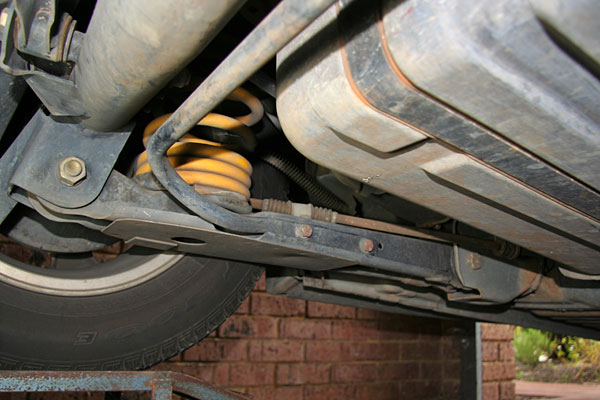
Removing the Factory sway bar
The first activity is to remove the factory rear sway bar.
I used car ramps to raise the rear of the car, and then it's just a matter of
removing the 4 bolts attaching the factory sway bar to the lower control arms, and
the sway bar can then be removed.
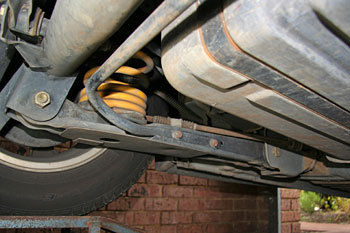
factory sway bar
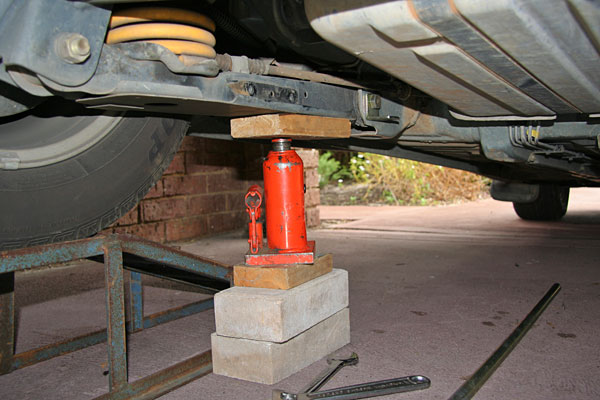
Installing the Whiteline sway bar
Brackets for the pin links need to be installed on the lower control arm mounting
bolt on each side of the car.
Before undoing the lower control arm mounting bolt, support the lower control arm
with a jack, to relieve the pressure from the rear spring.
Note that I found these bolts difficult to remove, and ended up purchasing
a 24mm ring spanner (my spanner set only went up to 22mm, and an adjustable crescent
didn't allow sufficient leverage).
I found I had to remove some of the exhaust mounts to allow the exhaust to be manoeuvred
out of the way to allow the lower control arm bolt on the right hand side to be removed.

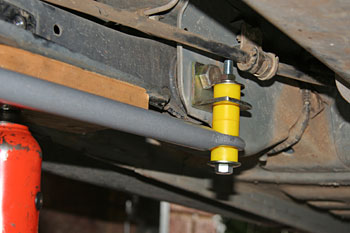
factory sway bar removed, new bracket installed
Once the brackets had been installed on the lower control arm bolts, I loosely attached the
rear of the sway bar to the axle, and then used the pin links to attach each end of the
sway bar to the newly installed brackets.
The pin link on the left-hand side is too long, and was contacting the handbrake cable.
Due to normal movement of the sway bar while driving, this pin link was likely to damage
the handbrake cable.
To prevent the pin link from contacting the handbrake cable, the left-hand pin link was shortened
by 10mm with a hacksaw.
pin link hitting the handbrake cable
(before the pin link was shortened)
After completing the installation of both pin links, the rear of the sway bar was attached
to the axle using the supplied u-bolts and bushes.
Polyurethane grease was liberally applied to the centre of each bush before it
was placed on the sway bar.

left-hand side
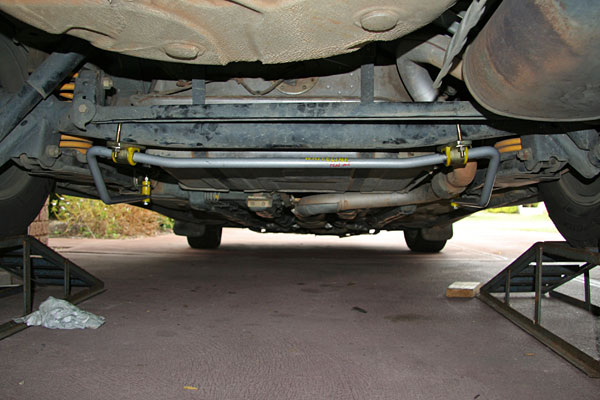
The instructions provided with the sway bar contained several photos showing an installed swaybar,
and these photos were used to determine the location of the u-bolt on the axle.
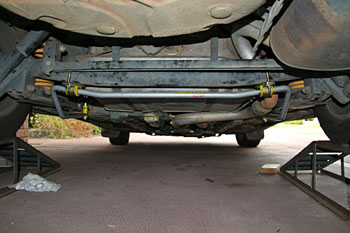
rear view after installation
After completing the installation, all bolts were re-tightened, and the car was taken for a
test drive around the block.
All bolts were subsequently re-checked, to ensure they were appropriately tightened.
Note that Whiteline specifically mentions installation of the sway bar, and tensioning
of all nuts and bolts should be done with the car at normal ride height, to ensure correct
alignment, clearance, and operation.
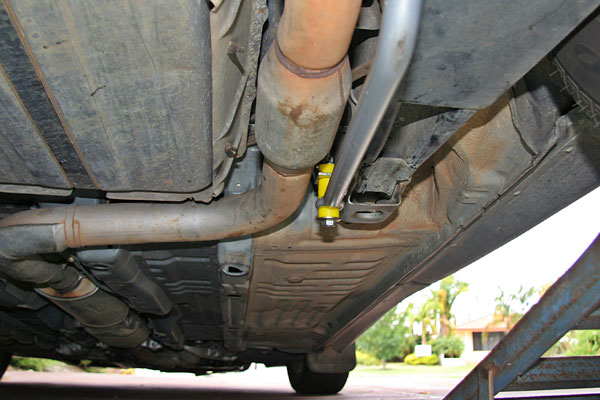
Exhaust Issues
When driving the car, an issue immediately became apparent. When the suspension was compressed
by a bump in the road, a loud "thumping" noise would result.
The frequency of this was significantly increased with additional weight in the rear of the car
(ie, some passengers in the rear seat).
Some investigation indicated this noise was caused by the exhaust coming into contact with the
pin link mount, and the sway bar itself.
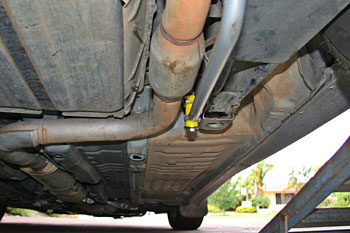
close proximity to the exhaust
I emailed Whiteline support about this issue, and they were very prompt with a response:
We have designed and fitted this swaybar on a vehicle with the
original exhaust and checked for swaybar clearance as part and parcel of
our design process. Although the swaybar is relatively close to the
exhaust on the right hand side, we are happy with the clearance, and we
have not observed any contact.
Could you check that your exhaust rubber mounts are in a good condition?
If you are able to bring your car to our workshop, we would be more then
happy to take a look at this issue, to see what we can do. If this is
not possible, let us know how we can be of help.
Unfortunately, taking my car to Whiteline's workshop was not an option, as it was located several
thousand kilometres away in NSW!
A quick inspection of all the exhaust mounts indicated they all appeared to be in good condition,
with no broken or torn mounts visible.
However, the mounts were 6 years old, and may have stretched and sagged over time, thus allowing
additional movement in the exhaust.
Also, the fact that my Magna has low King Springs (approx 30mm lower than standard height)
could have contributed to the problem, although a loaded car with factory springs
would certainly be lower than my unloaded car.
I paid a visit to my local exhaust shop, Kelmscott PRO Exhaust & Towbar Centre, to see
if the exhaust could be moved away from the sway bar to prevent the contact.
The guys there were very helpful, and put the car on a hoist to take a closer look at the exhaust.
One of the exhaust mounts was replaced with a shorter one, in attempt to move the exhaust to the
left a little.
They weren't sure if that would resolve the issue, and I wasn't charged for their time, or the new mount.
However, the issue was not completely resolved, but the new exhaust mount did reduce the frequency
of the contact between the sway bar and the exhaust.
As the factory rear muffler on my Magna was suffering from some loose baffles, I decided it was time for a replacement
rear muffler, so the car once again was taken to Kelmscott PRO Exhaust.
The rear muffler was replaced with a Lukey straight through muffler. As the Lukey muffler was much smaller
than the factory rear muffler, it meant the rear section of the exhaust could be lifted closer to the chassis,
thus ensuring more clearance between the exhaust and the sway bar.
(The small Lukey muffler was subsequently replaced by the much quieter, and significantly larger
Lukey LR2779 straight through muffler, but the guys at Kelmscott PRO Exhaust managed to keep the
exhaust far enough away from the sway bar to prevent contact.)
No further issues have been experienced with the exhaust contacting the sway bar. However, if a large
bump is encountered on the road, the exhaust can occasionally hit the bottom of the car, but this
occurs very infrequently.
Initial Impressions
For some reason, no polyurethane grease was included in my kit, but I had some grease from a previous
sway bar install, so that wasn't too much of an issue for me.
The pin links are only mild steel, rather than the high-tensile steel I was expecting.
However, Whiteline assure me that they are strong enough.
The pin link on the left-hand side was coming into contact with the handbrake cable, and
had to be shortened by 10mm. Apparently Whiteline didn't experience this issue
when developing the sway bar, and will look into it, with a view to using a shorter
bolt if possible.
The pin link on the right hand side is very close to the exhaust, and I was concerned that the
heat from the exhaust could cause premature failure of the polyurethane bushes.
However, Whiteline do not believe this to be an issue, and have had no reports of any such issues.
Note that to to the exhaust changes, the exhaust is now located a bit further away from the
polyurethane bushes.
The nuts provided for the u-bolts used to attach the sway bar to the rear axle did not come
with any locking washers, nor are they nyloc nuts (ie, nuts with a nylon insert prevent the
nut from being loosened by vibrations).
Whiteline tell me that they use the same style of axle attachment kit for many cars, and
have never had any issues with the flange nuts coming loose.
I must point out that Whiteline have been very helpful. They were always very quick to respond
to my emails, and provided as much help as possible (including an offer for me to take my car
to their very distant workshop).
With regards to the handling of the Magna with the new sway bar installed, it has certainly
reduced body roll, improved turn-in when cornering, and reduced the understeer.
The sway bar also reduces wheelspin of the inside front wheel when cornering hard, as it helps
keep both front wheels on the road.
In theory, with a stiffer rear-end, the car should be more susceptible to lift-off oversteer mid-corner,
but I haven't done much testing of this as yet.
Conclusion
I'm very happy with the results of installing the Whiteline rear sway bar on my Magna wagon.
Once some initial issues with the exhaust hitting the sway bar were resolved, the car is much more
poised when cornering, and is more enjoyable to drive.
This sway bar is definitely recommended if you want to improve the handling of your Magna wagon.
References
last updated 24 Mar 2026
|