|
posted Wednesday, 30 March 2011, 18:37 (+0800), by Martin
Revisiting photos taken a while ago, and post-processing (or re-post-processing them) can be
an interesting experience, as you can find photos that you didn't think were worth post-processing
at the time, as well as finding photos that you think are worth post-processing again,
using a different style.
While recently browsing through photos from a 2008 Tasmanian trip, I decided to post-process
some additional photos, and one of the results is shown below.
This photo shows loaf formations at the Tessellated Pavement, near Eaglehawk Neck, in Tasmania,
which I visited several years ago.
I found the Tessellated Pavement a fascinating place, and would definitely like to spend some more time there.
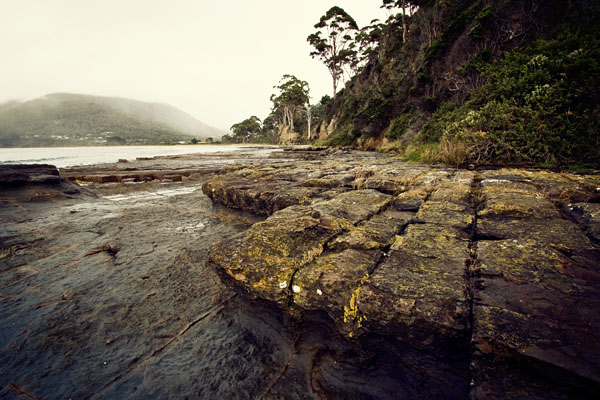
loaf formations at the Tessellated Pavement
Eaglehawk Neck, Tasmania
Canon EOS 350D, 10-22mm @12mm, 1/30 sec, f/9, ISO200
posted Sunday, 27 March 2011, 14:02 (+0800), by Martin
Working on a jigsaw puzzle on a recent holiday.
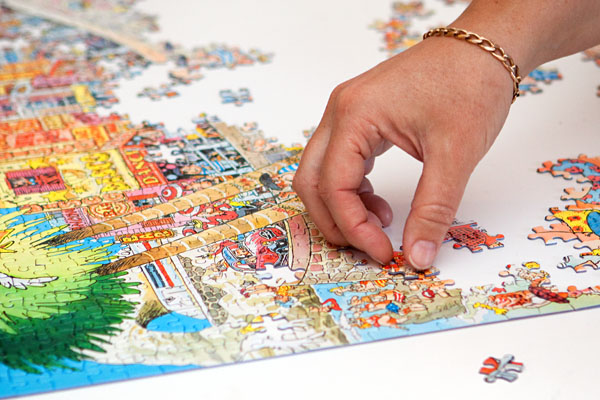
working on a jigsaw puzzle
Port Kennedy, Western Australia
Canon EOS 50D, 24-70mm f/2.8L @65mm, 1/80 sec, f/3.5, ISO250
posted Tuesday, 22 March 2011, 20:45 (+0800), by Martin
This is the seventh article in a
series on "understanding your camera"
that I am writing as I teach camera basics and camera operation to my children.


camera mode dials, all set to auto
(clockwise from top: Canon 50D DSLR,
Canon G5 point-and-shoot, Canon 350D DSLR)
Introduction
SLR cameras and many point-and-shoot cameras have a mode dial, allowing you to select one of a number
of different modes, depending on the conditions and how you want the camera to respond.
However, many people do not understand the different modes, and leave their camera in the fully automatic mode
all the time.
It is important to understand
exposure, and what the camera is doing
when you take a photo, and that is the reason why I'm looking at the different modes.
What's Wrong with Auto Mode?
In full auto mode, the camera is making almost all the decisions about the exposure
( aperture,
shutter speed
and ISO),
and has to guess what you want.
In many situations, you are much better off using some of the other modes available on your
camera, as it will allow you to make decisions about some of the variables,
while still (optionally) allowing the camera to make decisions about other variables.
In this post, I look at each of the modes available on most cameras, and
provide some information about how the camera reacts when configured to use that mode.
(Note that I am more familiar with Canon cameras, so some references are specific to Canon
cameras. However, the description of the modes is just as applicable to other
brands of cameras.)
posted Monday, 14 March 2011, 19:50 (+0800), by Martin
I love the juxtaposition of the bobcat parked outside a solicitor's office on an Adelaide street,
and couldn't resist taking a few shots while walking past.
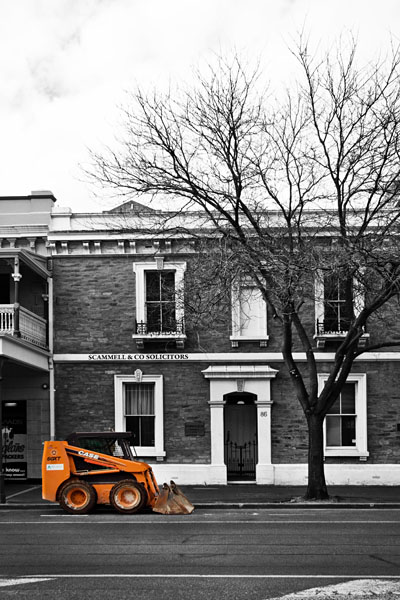
visiting the solicitor
Adelaide, South Australia
Canon EOS 50D, 10-22mm @22mm, 1/50 sec, f/7.1, ISO200
posted Friday, 11 March 2011, 19:54 (+0800), by Martin
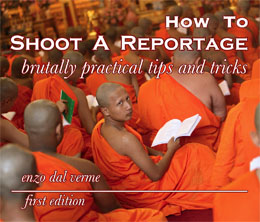
Enzo Dal Verme is a photographer based in Milan and Paris, and he shoots for various magazines,
including Vanity Fair, Marie Claire, Elle, Glamour, and others.
He says people kept on asking him for tips on how to shoot reportage,
and as a result, he decided to publish
"How To Shoot A Reportage",
where he shares what he has learned from his experiences around the world.
Enzo provided a free copy of the PDF version of this eBook for review purposes.
Reportage, according to thefreedictionary.com, is
"the reporting of news or information of general interest", so in relation to photography,
reportage is photojournalism. I think the author assumes anyone reading this eBook
knows what reportage is, as he doesn't define the term at all.
The PDF version of "How To Short a Reportage" is a 68-page eBook full of practical tips
and advice on shorting reportage.
Enzo discusses numerous topics, including finding inspiration, why people shoot reportage,
different types of reportage, preparation, and more, before going onto the practicalities of
shooting itself.
Numerous photos are included in the book, demonstrating many of the practical aspects
mentioned in the text.
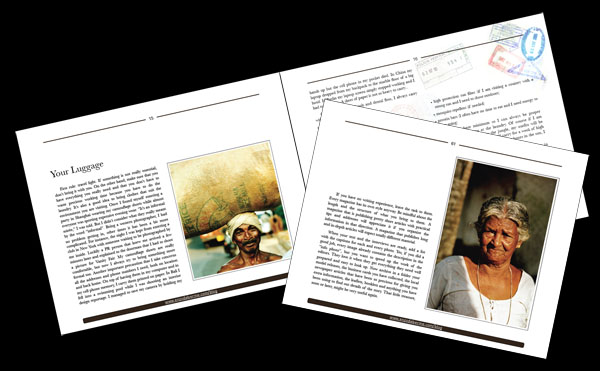
For anyone interested in photojournalism,
"How To Shoot A Reportage"
is a great reference, with plenty of useful and practical information in it.
This eBook can be purchased from
Enzo's website,
and is available in EPUB format for E4.99 (approx USD$6.95),
or PDF format (contains more images than the EPUB version) for E8.59 (approx USD$11.95),
with a print edition coming soon.
posted Thursday, 10 March 2011, 20:52 (+0800), by Martin
I still have a back-log of photos from 2009 and 2010 that I need to go through,
and I am slowly working through them as I find the time.
This 30-second exposure was taken in Adelaide in October last year,
when I had a fantastic view of the sunrise from my hotel window.
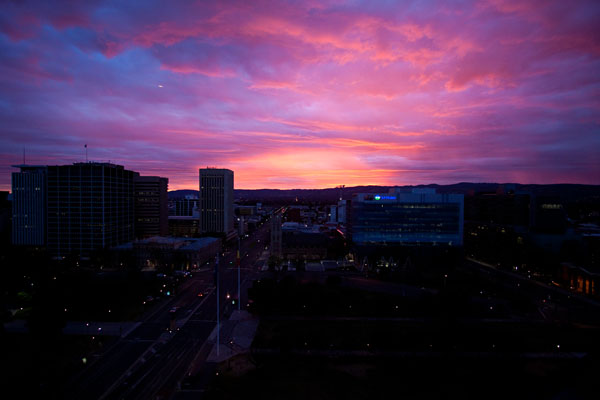
sunrise over Adelaide
Adelaide, South Australia
Canon EOS 50D, 10-22mm @10mm, 1/30 sec, f/3.5, ISO400
posted Tuesday, 08 March 2011, 20:45 (+0800), by Martin
Yesterday I was testing some lighting setups with two reflective umbrellas on light stands,
each with a Canon 580EX flash firing into it, triggering the flashes with
a Canon
ST-E2
wireless flash transmitter mounted on the camera's hotshoe.
I wasn't concerned about ambient light, so I was shooting with the camera in manual mode,
way under-exposed for the ambient light inside,
and relying on the flashes in ETTL mode to provide enough lighting.
The background is a plain wall in the living room.
I managed to talk my wife into being the first test subject, and with some minor tweaking
of the umbrella positions, I got the shot shown below.
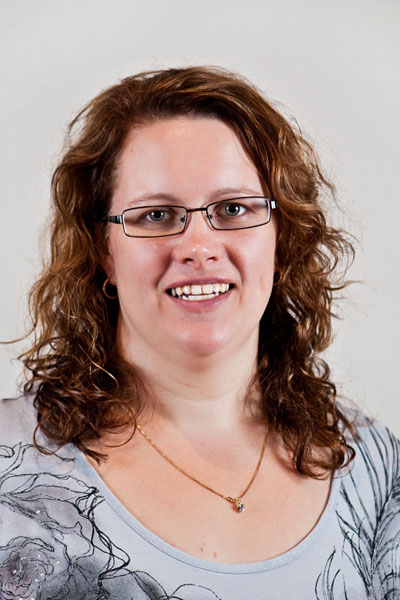
Ruth
Seville Grove, Western Australia
Canon EOS 50D, 24-70mm f/2.8L @70mm, 1/100 sec, f/2.8, ISO200
I was pretty happy with the result, particularly given the very quick setup time of the light stands
and umbrellas.
Using ETTL mode for the flashes in a situation like this means there's virtually zero setup time of the flashes themselves,
other than potentially dialling in some flash exposure compensation to achieve the desired lighting.
posted Friday, 04 March 2011, 21:53 (+0800), by Martin
Late last year, inspired by some of the long-exposure photos by Tasmanian photographer
Alex Wise,
I bought a
B+W ND 3.0 filter.
It is a neutral density filter with an ND 3.0 rating, which means it reduces the
exposure
by 10
stops, letting just 0.1% of light through.
In other words, it's an expensive piece of dark glass!
I bought a 77mm sized filter, to fit my
Canon EF 24-70mm f/2.8L lens
and
Canon EF-S 10-22mm lens.
An ND filter reduces the amount of light allowed through the lens, thus allowing the use of much longer
shutter speeds
during the day.
Here is one of the first photos I took using the 10-stop ND filter. This is a beach scene at Point Peron, taken about half an hour
before sunset, in January.
The ND filter allowed a 30 second exposure with a fairly wide aperture of f/5.6.
A long exposure on such a scene serves to completely blur the waves, resulting in a flat ocean, and milky/smoky
water where the waves were breaking on the beach.
Due to the movement of the clouds during the exposure, they are also blurred, providing a streaked look in the sky.
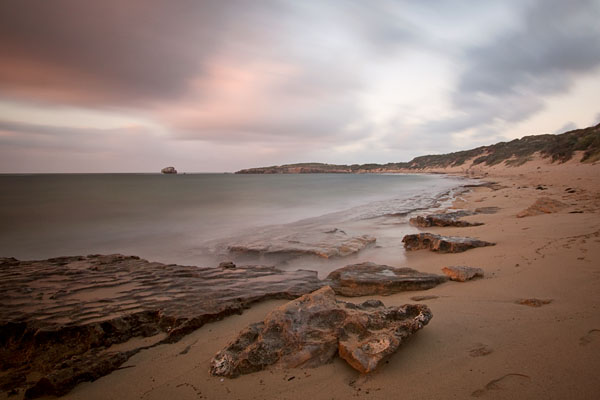
long exposure at Point Peron
Point Peron, Rockingham, Western Australia
Canon EOS 50D, 10-22mm @13mm (10-stop ND filter), 30 sec, f/5.6, ISO100
|
|