posted Thursday, 19 February 2015, 19:35 (+0800), by Martin

re-packaged KAP transmitter
Introduction
This page describes the radio control transmitter that I re-packaged, to make it smaller and more portable, and more suitable for kite aerial photography (KAP).
Kite aerial photography (KAP) is a form of aerial photography, where a camera is suspended from a kite line to allow aerial photos to be taken, with the camera either being triggered by an intervalometer, or controlled and triggered via radio control. My KAP camera rig uses a 6-channel radio control transmitter and receiver to control the camera, allowing me to rotate and tilt the camera while it is airborne. Depending on which camera I use, I can also remotely trigger the camera shutter.
Read my Introduction to Kite Aerial Photography guest post on DIYP for more information on the how and why of KAP, and have a look through some of my KAP photos.
Why Re-package the Transmitter?
As I have taken my KAP gear on a couple of domestic and international business trips, I wanted to make it more portable. The transmitter is quite bulky, and the protruding joysticks don't make it easy to pack. Some of the re-packaged KAP transmitters posted on the KAP forums provided inspiration and ideas, including:
- 2.4 GHz transmitter goes to the chop shop
- Dave's Chopped Spektrum
- Customized Turborix
- custom Arduino KAP transmitter (more details in this forum thread)
- forum thread with various completed results
To achieve this, I decided to:
- use 8 x AAA batteries instead of 8 x AA batteries
- custom-build a smaller case
- use a removable antenna
- remove un-used circuitry and controls
As these transmitters are so cheap (~USD$25), I bought a second transmitter specifically for this re-packaging project, to allow me to continue to use a standard transmitter for KAP while working on repackging the second transmitter.
KAP Transmitter
I use a cheap 2.4GHz 6-channel HK-T6A V2 RC transmitter and receiver from Hobby King, and am currently only using two channels - one for camera rotation, and one for camera tilt.
The main reason I bought the 6 channel TX/RX is because it is user-programmable via a USB interface, while the 4 channel TX/RX is not.
The HK-T6A is also sold under various other names, including Exceed CT6A, Turborix, FlySky FS-CT6A. For more information on using and programming these transmitters, refer to:
- Installing and using T6Config software on a PC
- FlySky FS-CT6A Manual
- Beginners Guide to Configuring the T6 Program
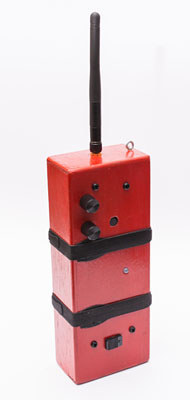
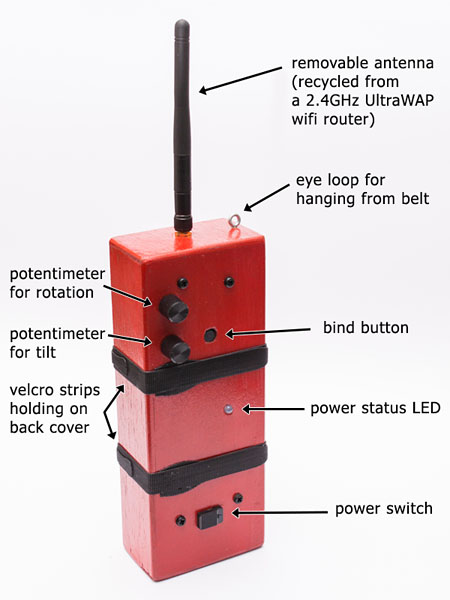
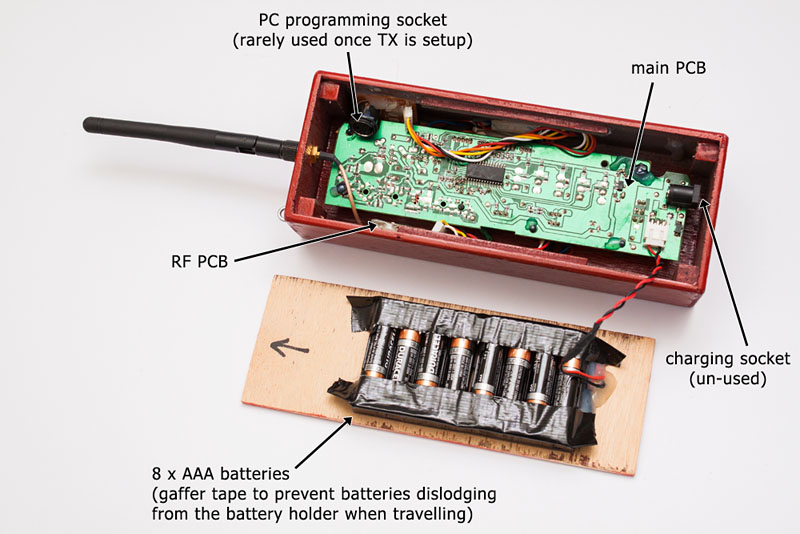
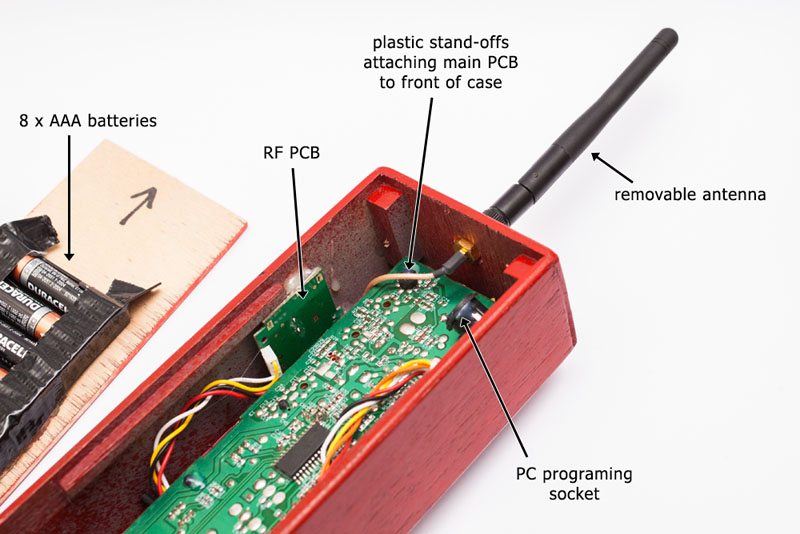
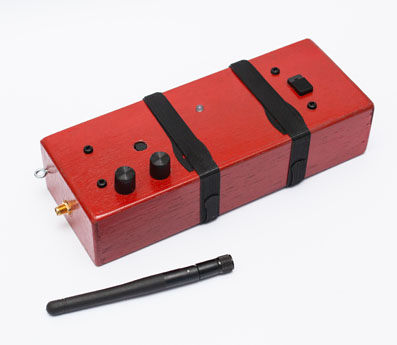
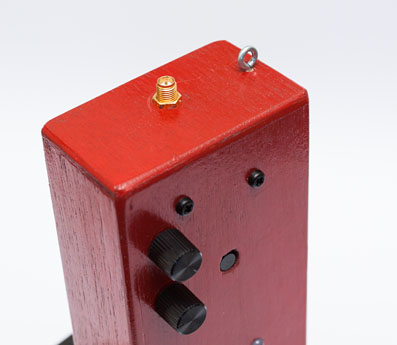
Photos: The Completed Transmitter
Some photos of the completed transmitter, with annotations to describe the various components and features:
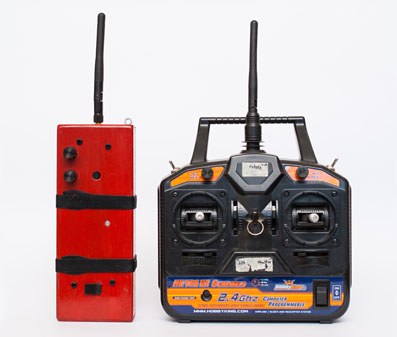
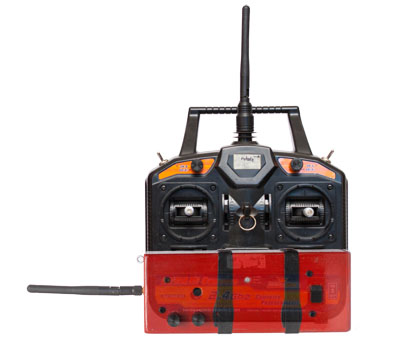
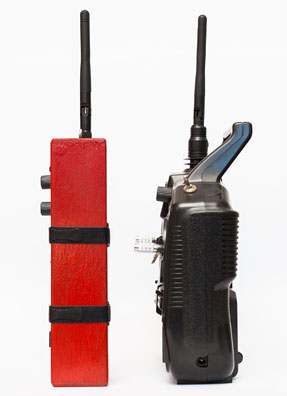
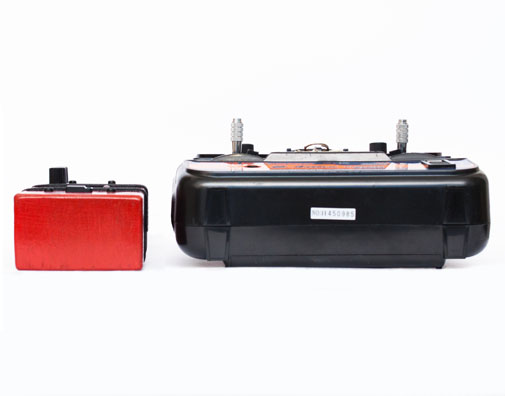
Photos: Comparison with Original Transmitter
Comparing the re-packaged transmitter with the original transmitter shows how much more compact and portable it - and with a removable antenna and no protruding joysticks, it is much easier to pack into my backpack.
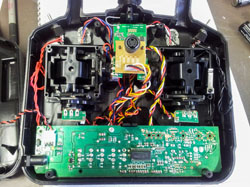
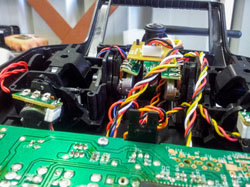
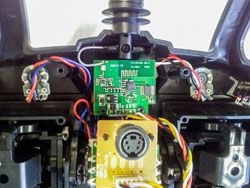
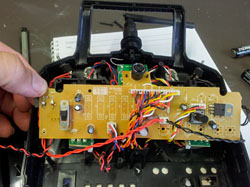
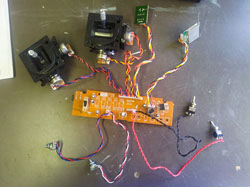
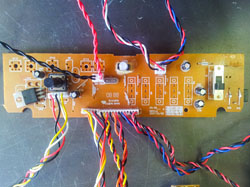
Photos: Inside the Original Transmitter
Here are some photos showing the insides of the original transmitter before I started disassembling it. These photos also served as a reference to ensure I knew how everything was originally wired to the PCB.
The wiring to the controls for all un-used channels were cut short and taped.
Conclusion
The re-packaged transmitter is a lot smaller than my previous transmitter, making it easier to pack. The smaller size also means it is much easier to use one-handed when the other hand is occupied with holding a kite line. It has travelled with me on several international and domestic trips, and I definitely appreciate the smaller size and one-handed control.
While only two channels are currently being used, additional channels can be used in the future by re-attaching the appropriate potentiometer to the main PCB in the transmitter, and mounting them in the case.
I was initially going to screw the back of the case on, but decided to use some velcro straps, as it's easier to open in the field (no screwdriver required) if I ever need to change the batteries.


Nice work and photos! It seems that the most recent KAP photos that you posted here on your blog were in 2014 - I look forward to seeing some new ones! :)